If the family has had a Personal Detail added to their record that has been marked as 'Flagged for attention' a flag icon will then appear on their Main Details screen on the top menu next to their name and family ID number. Clicking on this flag will open a window with further details.

If your organisation wishes to change the colour of flags they can do so via 'Settings' (on the top menu) > 'Manage Theme'. Please note that if no colour is set for the module logged into the flag will be output as yellow.
To modify any fields on this page you must first click the 'Modify' button on the bottom bar.
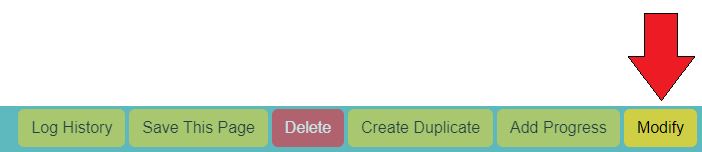
To save your changes click 'Save This Page' button. Or, if no changes have been made, click 'Display' to stop modifying the record.
Within the Main Details screen voice typing can be used on any fields with this button:

Simply click the button to begin voice typing and click it again to stop.
Please Note: Voice typing is not available in Internet Explorer.
¶ Family Main Details
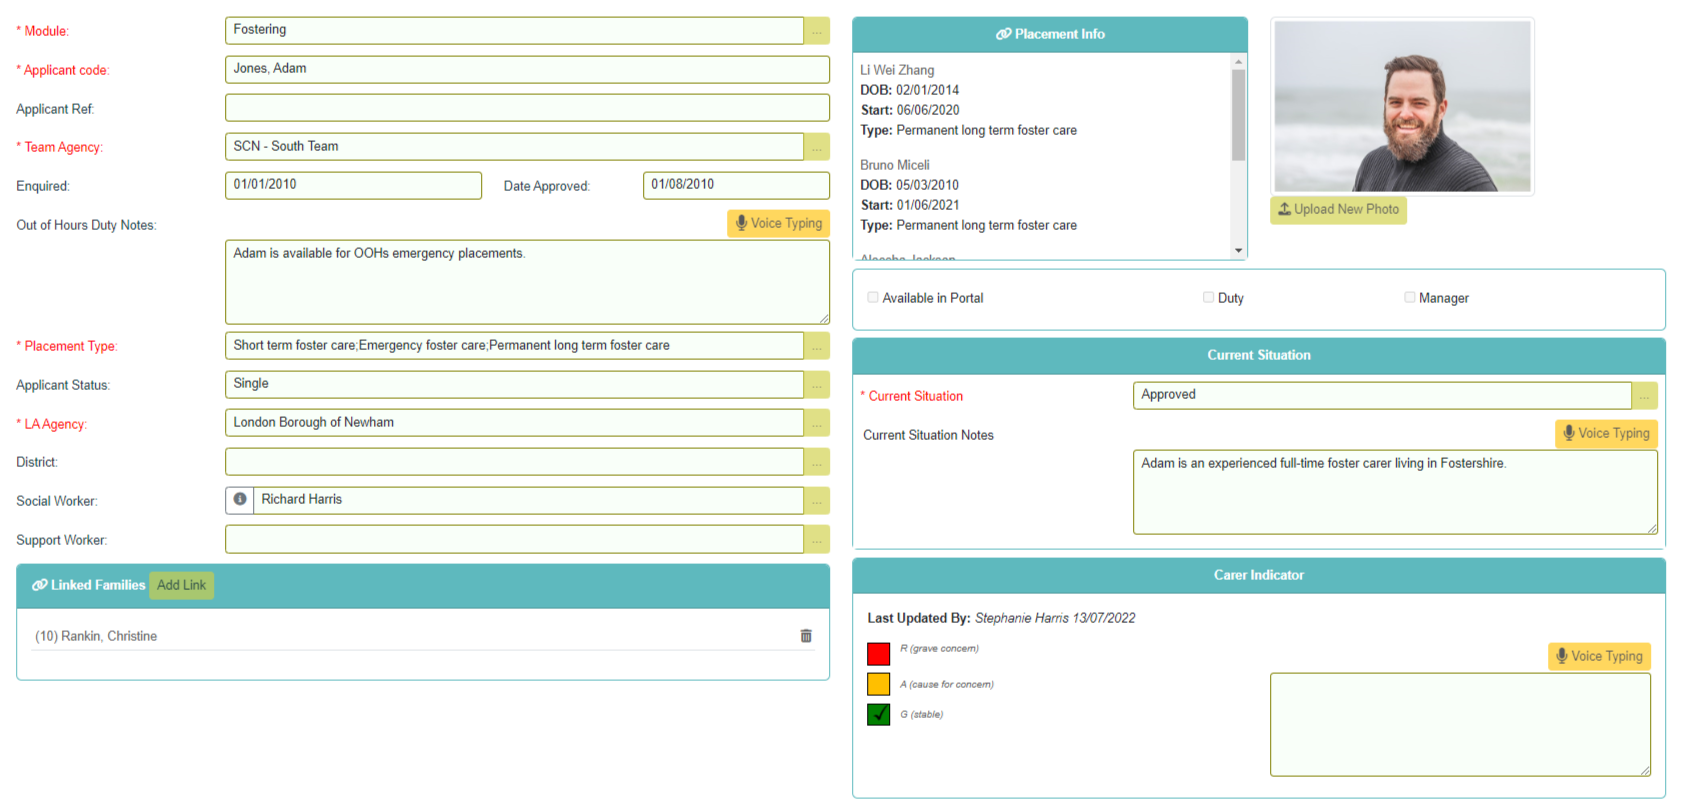
- Module – Indicates which CHARMS module/s or teams have access to the record e.g. Fostering. This field is only visible to users who have the permission to pass records onto another module or team. Any changes to this will be recorded in the Progress screen with the action 'Change of Module'.
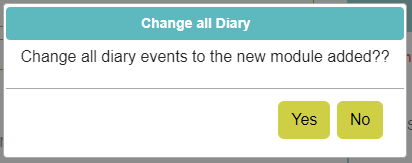
When a new module is added, users are given the option to move all existing progress to the new module. Users also get the option to move all diary entries.
Please Note: If a families module is changed and the family already has carers/users setup, e.g. the family has users visible in Carer Login, they will be prompted to update the active carer's user modules to the new module. Otherwise they will not be able to login.
- Applicant Code – Automatically generated when the name fields are completed.
Please Note: This is usually inputted as the carers or adopters names e.g. Cooper, Karen & Mike. The applicant code has to be unique to each family so if you try to add a name that already exists then the system will prompt you to use e.g. ‘Cooper, Karen & Mike – 1’.
- Applicant Ref – If applicable, enter the family’s reference.
- Team Agency – If your organisation is split into regions or different offices, use this field to indicate which of your offices the family relates to. This field can be switched on to be mandatory if required.
- Date Enquired – Enter the family’s initial enquiry date. This date will default to today’s date, but can be overwritten if necessary if, for example, the family re-enquires.
Please Note: This date will be automatically appended to the families progress when entered on the ‘Main Details’ page.
- Date Approved – If applicable, enter the date approved.
Please Note: This date will be automatically appended to the families progress once entered on the ‘main details’ page.
- Out of Hours Duty Notes – Add any notes for OOH/Duty staff. These notes will also be output on the Vacancy List.
Please Note: Changing the Current Situation or Out of Hours automatically logs a progress event of 'Current Situation Notes Change' and 'Out Of Hours Duty Notes Change' along with the 'from' and 'to' changed notes values in progress note.
- Placement Type – Click the ‘…’ button & select the relevant placement type from the lookup list.
Please Note: You can select more than one placement type against a carer.
- Applicant Status – Click the ‘…’ button to select the applicant's status from the lookup list.
- LA Agency – Add the Local Authority your carer comes under.
Please Note: If this is amended, a row will automatically be added to Progress under 'LA Agency Changed' with the details in the notes.
- District – Add the geographical district the carer comes under.
- Social worker – Click the ‘…’ button to allocate the family's social worker from the lookup list. If the social worker is not currently recorded on CHARMS you can add them by clicking the 'Add New' button. When a social worker is added a progress item will be added called ‘Worker added’. Whenever this is updated, a further progress row will be added for ‘Change of Worker.’ Clicking the 'i' button opens up a quick view of the social worker's details.
- Support Worker - Click the ‘…’ button to select the family's support worker from the lookup list - this would normally be an internal member of staff supporting the Social Worker.
- Linked Families - Click this to link another family to this record, e.g. a backup or co-carer. When a family is linked, click on the Family ID number for quick access to the associated family.
- Placement Info – Contains details of the family's current placement/s, including the child's DOB, start date and placement type. Clicking on the child's name will take you to the child's record.
Please Note: If you are an adoption agency using CHARMS, there is a setting to include placements with an 'end date' here (the default is that only current placements are displayed. Please speak to your account manager if you require this setting to be switched on in your Adoption module.
- Upload New Photo - Click here to upload a photograph that relates to the family record - once uploaded, this photo will display in place of the button.
- Available In Portal - ticking this box will make the family available within the CHARMS Live Search in the CHARMS-Portal, as long as the family has vacancies recorded and no withdrawn date.
- Duty – Click to enter a tick if this record requires any follow up or work by the duty worker. Any records with the Duty field ticked can be filtered for by the duty worker on the families search screen.
- Manager – Can be used to flag a record in the Search screen.
- Current Situation – Select from the lookup list the current situation for the family e.g. ‘Approved’ or ‘Enquiry’.
Please Note: If the current situation is updated, this will be appended to the progress tab along with the date of the change and a record of the previous current situation will be displayed in the progress notes, as well as the contents of the Current Situation notes at the time of the change.
- Current Situation Notes – Add any relevant notes.
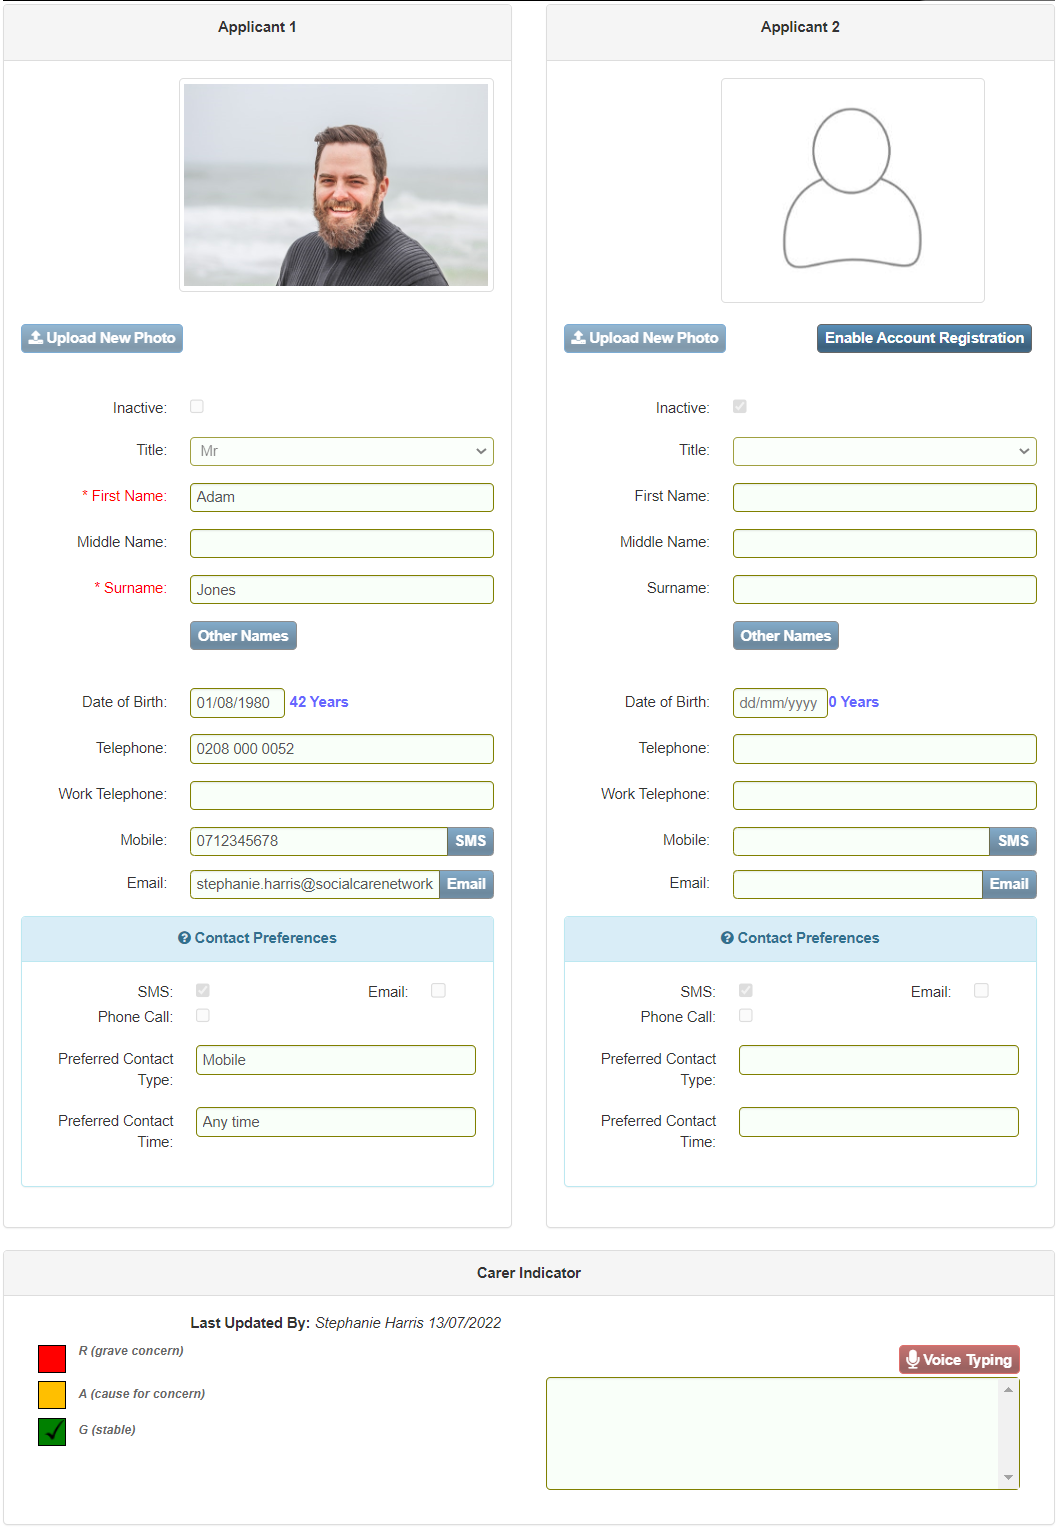
- Upload New Photo – Click here to upload a photograph of each individual applicant (if more than one).
- Enable Account Registration – This button enables self-registration for the applicant. For further information on the wiki page Family - Main Details - User Registration
- Inactive – Tick if you wish to exclude any carer from correspondence sent directly from CHARMS.
- Title – Select from the lookup list the title for applicant 1 & if applicable applicant 2.
- First Name – Enter the first name for applicant 1 & if applicable, applicant 2.
- Middle Name – Enter the middle name for applicant 1 & if applicable, applicant 2.
- Surname – Enter the surname for applicant 1 & if applicable, applicant 2
- Other Names – Click the Other Names button and record where applicable.
- Date Of Birth – Enter the date of birth for applicant 1 & if applicable, applicant 2 - once entered, CHARMS will calculate the applicant’s age.
- Telephone – Enter the contact telephone number for applicant 1 & if applicable, applicant 2.
- Work Telephone – Enter the work telephone contact number for applicant 1 & if applicable, applicant 2.
- Mobile – Enter the mobile contact telephone number for applicant 1 & if applicable, applicant 2.
Please Note: Once the mobile number has been stored, agencies are then able to use the SMS button to send text messages to applicants. Clicking SMS will open a new window wherein a short message can be typed. Once this is sent, a row will automatically be added to Progress with the details. To use SMS, please contact your SCN Account Manager.
- Email – Enter the email address for applicant 1 & if applicable, applicant 2
Please Note: Users with the VIEW_STANDARD_LETTER permission will have an option to email individual applicants by clicking the Email button in the Email field. This will open the Standard Letter functionality.
- Contact Preferences - Tick to select applicable method/s of contact for app1 and app2 along with preferred contact type and time.
- Carer Indicator – RAG Rating for families with accompanying Notes box. When updated a row is added to the family's Progress. The current indicator is output on the family search screen as well as the families widget on the dashboards.
Please Note: RAG indicator labels can be customised. If your agency would like to amend these labels please submit a data change request.
¶ Address

- Address – Enter the full address for the applicants including town, county and postcode.
- Search for address – Here users can enter a postcode, click 'Search for address', and choose from a list of returned addresses. The selected address will automatically populate the address fields, helping to reduce manual entry and improve accuracy. Where available, the correct Local Authority will also be selected automatically.
Please Note: The Postcode and Address Lookup feature is is a chargeable add-on and not enabled by default. If you’re interested in enabling this feature, please email Carla.Moores@socialcarenetwork.com for further info, pricing, and activation.
- Move to Previous Address – Clicking this button will allow you to move the current address to the Previous Addresses section.
¶ Ethnic Origin & Religion Notes
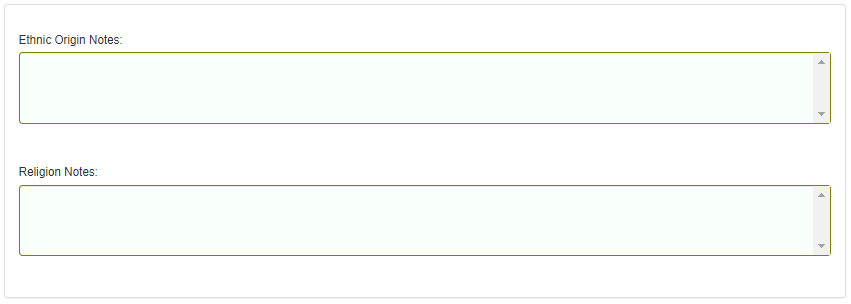
- Ethnic Origin Notes – enter any additional notes regarding the applicant's’ ethnicity.
- Religion Notes – enter any additional notes regarding the applicant's’ religion.
¶ Further Details
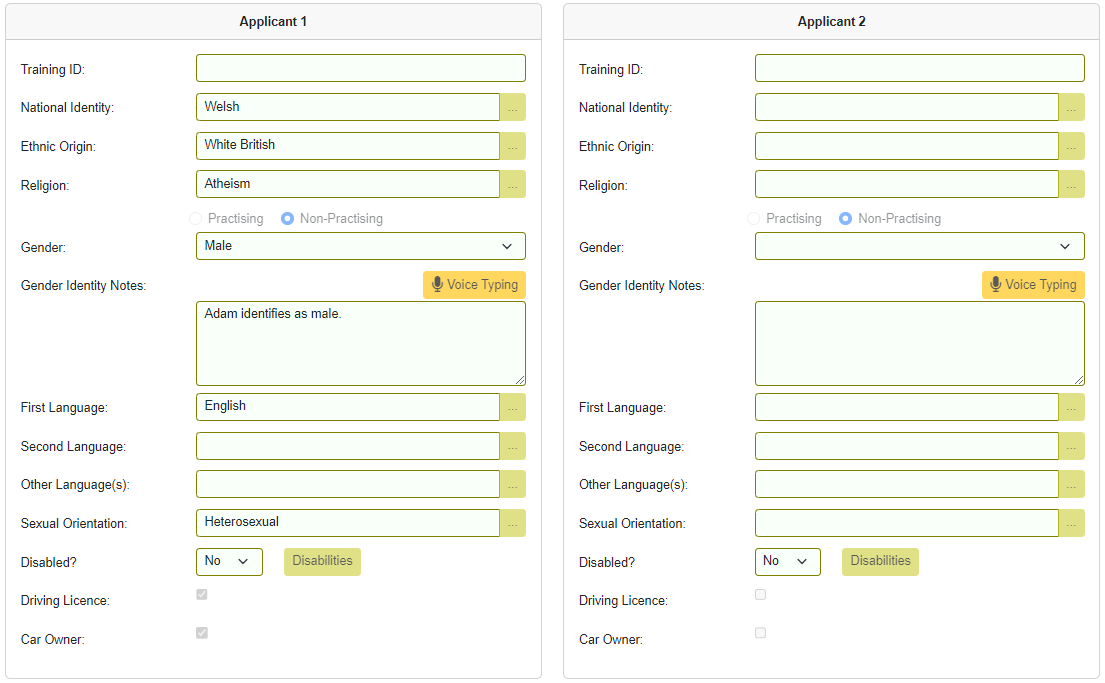
- Training ID – Enter the applicant's training ID, if applicable.
- National Identity – Select from the lookup list the national identity for applicant 1 & if applicable, applicant 2.
- Ethnic Origin – Select from the lookup list the ethnic origin for applicant 1 & if applicable, applicant 2.
- Religion – Select from the lookup list the religion for applicant 1 & if applicable, applicant 2 & indicate whether they are practising or non-practising by clicking the relevant item.
- Gender – Select from the lookup list the gender for applicant 1 & if applicable, applicant 2.
- Gender Identity Notes – enter any details about the applicants' gender identity.
- 1st Language – Select from the lookup list the 1st language for applicant 1 & if applicable, applicant 2.
- 2nd Language – Select from the lookup list the 2nd language for applicant 1 & if applicable, applicant 2.
- Other Language (s) – Add any other languages for applicant 1 & 2 if applicable.
- Sexual Orientation – Select from the lookup list for applicant 1 & if applicable, applicant 2.
- Disabled? – If applicable, enter a tick for applicant 1 & 2.
- Disabilities – If the applicant has any disabilities you can add them using this button.
- Preferred Contact Type – If applicable, enter for applicant 1 & 2.
- Preferred Contact Time – If applicable, enter for applicant 1 & 2.
- Driving Licence – If applicable, enter a tick for applicant 1 & 2.
- Car Owner – If applicable, enter a tick for applicant 1 & 2.
When any of the family address fields are changed, at the point of saving, if the family/carer has current placements the system will display the following message:
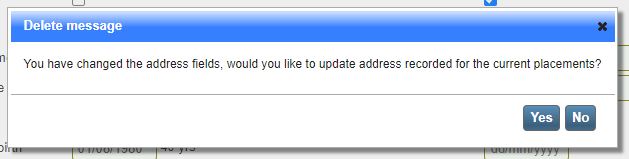
If the user clicks 'Yes' the family address against all current placements will be updated.
If the applicants/carers move address, utilise the ‘Move To Previous Address’ button. Once clicked, you will be prompted to enter the date of the last day the carer lived at this address (by default this will show today's date) and given the option of whether or not to clear the existing address from the family's Main Details.
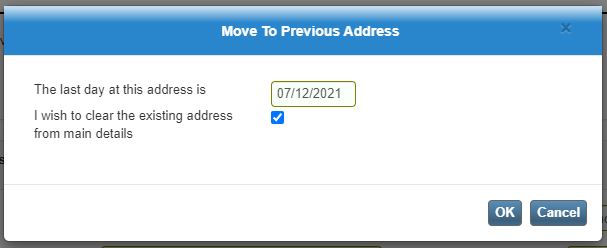
If 'OK' is clicked, the following warning message will appear:
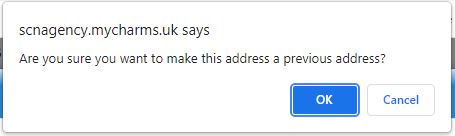
If 'OK' is clicked the address will then be stored for future reference on the Previous Address screen and you can enter their new address onto the Main Details section.
¶ Marketing Source
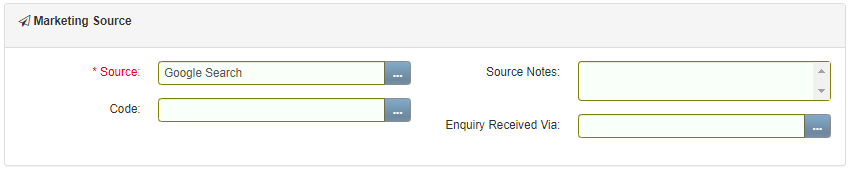
- Source – Select the applicants marketing source.
- Code – If applicable, select from the lookup list the associated marketing source code.
- Source Notes – Enter any notes in relation to the marketing source.
- Enquiry Received Via – Click ‘…’ to open the lookup list to select the correct option.
¶ Approved For
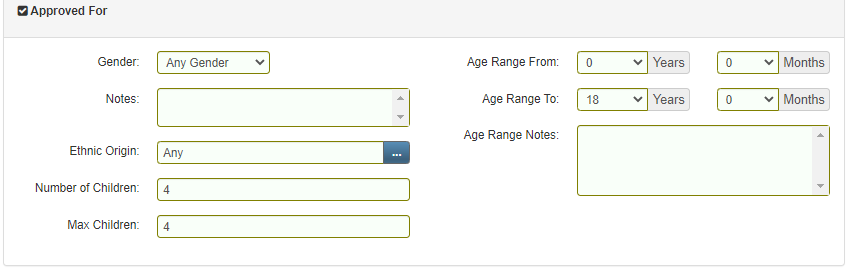
- Gender – If applicable select the gender of child that the family is approved for.
- Notes – If applicable, enter any notes in relation to the gender approved for.
- Ethnic Origin – Click ‘…’ to open the lookup list to select the correct option.
- Numbers of Children – If applicable enter the number of children that the family are approved for or interested in caring for e.g. 1 or 2 if siblings.
- Max Children – If applicable enter the maximum number of children that the carers can take.
- Age Range From – If applicable, select the age range of a child/young person in years in months that the family is approved to care for.
- Age Range To – If applicable, select the age range of a child/young person in years in months that the family is approved to care for.
- Age Range Notes – Enter any notes in relation to the age range approved for
¶ Availability/ Vacancies
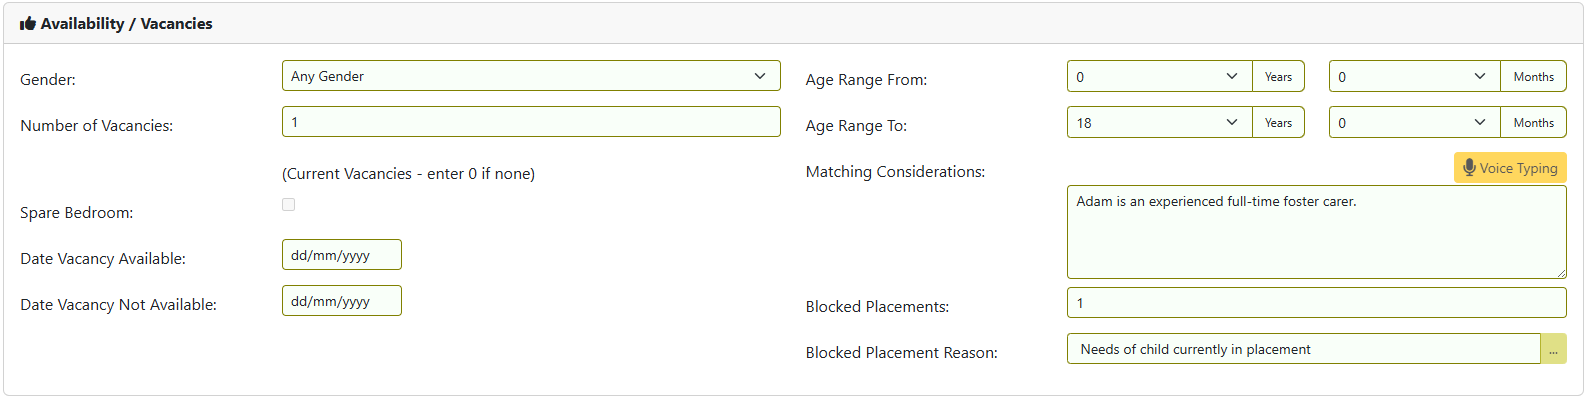
- Gender – If applicable select the gender of child that the family has a vacancy for.
- Number of Vacancies – If applicable select the number of children that the family has a vacancy for, this must be updated manually if a child is placed.
- Spare Bedroom – Tick if carer has spare bedroom.
- Date vacancy available – enter the date at which any vacancies will become available (if, for example, a placement has a planned end date at which point there will be a vacancy).
- Date vacancy not available – enter the date at which any vacancies will cease to be available (if, for example, a family has a planned break forthcoming).
- Age Range From – If applicable select the age range in ‘years & months’, ‘from & ‘to’ with regards to vacancies available.
- Age Range To – If applicable select the age range in ‘years & months’, ‘from & ‘to’ with regards to vacancies available.
- Matching Considerations – Enter any notes here that will be useful to anyone reading the various vacancy lists available from Charms. For example, enter as much detail in here with regards to; birth children at home, matching considerations for any children placed currently with the carers, future holidays that the carer has booked, if the carer drives & work hours / commitments etc.
- Blocked Placements – This is a calculated field, based on the Max Children, the number of current placements, and the number of vacancies recorded.
- Blocked Placement Reason – If the family has a blocked placement, choose a reason from the lookup list.
Important Note: The current resources should reflect what vacancies the carers currently have. This section should be completed once a carer is approved then updated whenever a child’s placement has started or finished. If the carers don’t have any vacancies, then enter 0 in the number of vacancies section. Any carers with a figure > 0 in the vacancies will be displayed on the ‘Vacancy List’ report available to all users from the Main Menu or on the Dashboard for those users with the Available/Placed widget. It is essential that the current resource section is used correctly and kept up to date as and when necessary.
¶ Archived/Closed Details
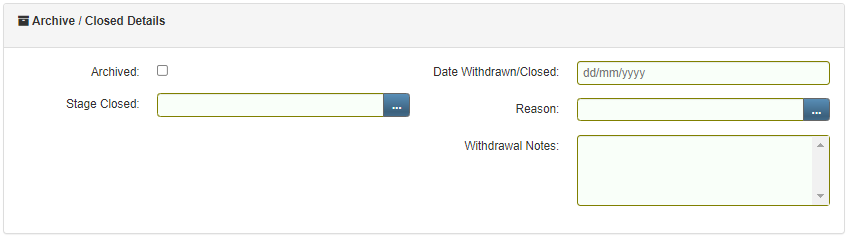
- Archived – If applicable click to select ‘yes’ or ‘no’ to indicate if this family’s record has been archived or not.
- Stage Closed – This will automatically populate with the previous Current Situation before the record was closed.
- Date Withdrawn/Closed – If applicable enter the withdrawn/closed date.
Please Note: This date will be automatically appended to the family’s progress when entered on the ‘main details’ page.
If the family has an open placement at the point of the date withdrawn, a prompt will appear to close those placements.
If the family has active users associated via the Carer Login section the following prompt will appear: 'There are active user accounts associated to this record, would you like to archive them from the withdrawn date?'
- Reason – Click ‘…’ to open the lookup list to select the correct option.
- Withdrawal Notes – Add any notes.
Please note: If a record has been closed by entering a withdrawn date, a warning message will appear if a user clicks Modify to change information on the record.
If a family record has been closed after an initial enquiry then subsequently enquire again at a later date on the existing record you can remove the archive tick and withdrawn date. The existing date enquired can also be overwritten to reflect the new referral date. Any dates entered in the ‘Date Enquired’ or ‘Withdrawn’ date fields will be appended to progress automatically, so the full history of the family’s enquiry process is contained within the record.
¶ Data Retention
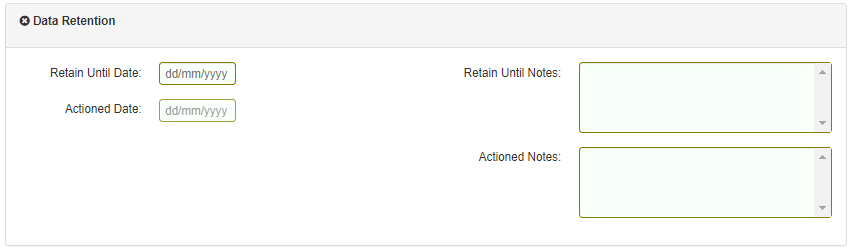
- Retain Until – If a record should be retained until a certain date, please enter that date into the Retain Until Date field.
- Retain Until Notes – Should be used to explain why the record is being kept for the specified length of time.
- Actioned Date – Once a record is anonymised, the date of the anonymisation will appear in the Actioned Date field, and
- Actioned Notes – Use to enter details of who requested and authorised the request.
Please Note: It is important to be aware that the Retain Until Notes will not be anonymised if the record is selected for anonymisation - as such, users should not store any sensitive or personally identifiable information in this box.
The 'Create Duplicate' button at the bottom of the Family Main Details screen can be used to copy certain information from an existing record into a new one.

Please speak to your SCN Account Manager for guidance about this feature.
If the family have had a change of circumstances and will require a new record, e.g. separation, divorce, or bereavement, you may wish to use the Copy Record function.
Once all applicable information has been completed on the family’s main details, click ‘Save This Page’ and use the links on the left to continue adding relevant information.
¶ Deleting a Family's Record from their Main Details page
Users with the permission DATA_RETENTION will see a 'Delete' button on the bottom of a family's Main Details page. This can be used to delete a family's record directly from their Main Details page as opposed to using the Data Retention tool.
Users with the permission DATA_RETENTION will see a 'Delete' button on the bottom of the page which they can use to delete a family record from their Main Details page (as opposed to using the Data Retention tool).

In order to delete a record it must be closed and archived. When ‘Delete’ is clicked and the record is not yet closed and archived, a message will be displayed ‘You cannot delete an active record. Please set Withdrawn date and archive the record if you wish to delete’.
When ‘Delete’ is clicked and the record is closed (has a withdrawn date, is archived): If the record is basic (does not contain data other than on main details) then it can be deleted without going through the data retention process. E.g. If a record has been added in error, you can delete a record this way by first deleting progress data e.g. Notified, Withdrawn etc. Any records already part of a data retention request cannot be deleted in this way.
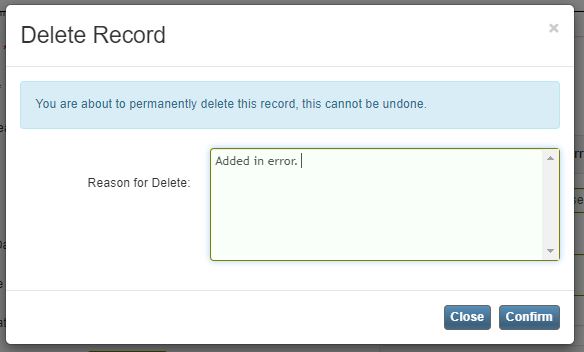
When ‘Delete’ is clicked and the record has placement history a message is displayed ‘You cannot delete a record with placement history’.
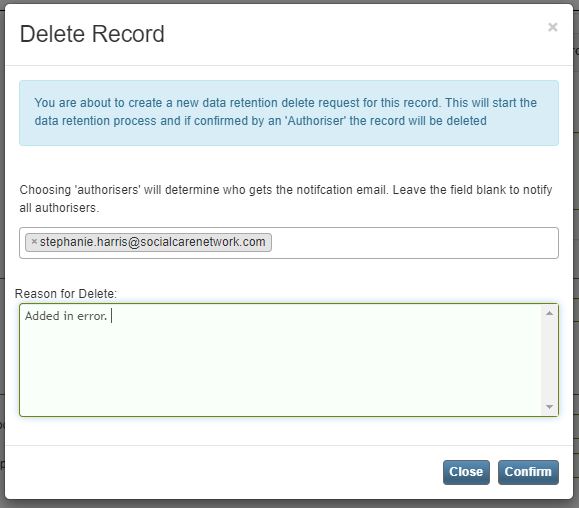
If the record is not basic (it has progress and data in the left menu items, but no placement history) then the data retention process will be started e.g. a data retention ‘delete’ request will be added for the record. The user will either have to select an authoriser or leave blank to notify all users with DATA_RETENTION_AUTHORISER and enter a ‘Reason for Delete’ which is mandatory.